
*Tv-release*
Active Member
Multi OEM/Retail Project Build 28.04.2023
File size: 93 MB
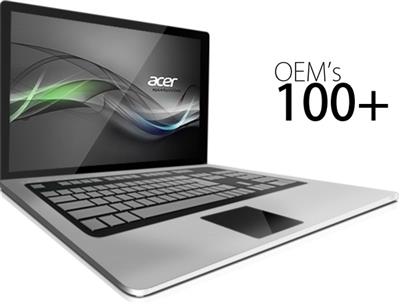
100+ OEM's
• Acer • Advent • Action • Alienware • AOC • Aquarius • ASRock • Asus • ATcomputers • Bangho • Beko • BenQ • BGH-SA • ByteSpeed • Casper • CCE • chiliGREEN • Compaq • crea • CZC • Dell • Depo • digimix • ECS • eMachines • Epson • Equus • Everex • Excimer • EXO • Exper • Extra • Founder • FSC • Fujitsu • Gateway • Genuine • Gericom • Gigabyte • Greatwall • Haier • Hannspree • Hasee • HCL • Hedy • Higrade • HP • Hyrican • IBM • Impression • Infinity • Insys • Intelbras • iQon • Itautec • Jetway • JooyonTech • Kohjinsha • Kouziro • Kraftway • KSystems • Lanix • Lenovo • LG • M&A Technology • Maxdata • Mecer • Medion • Megaware • Mesh • Mitac • Mouse • MSI • NEC • Nokia • Olidata • Olivetti • Onkyo • OQO • Packard Bell • Panasonic • Paradigit • Paragon • Philco • Positivo • PowerSpec • Prolink • qbex • Quanmax • RMplc • Rover • Samsung • SCC • Semp Toshiba • Seneca • Sharp • Sony • Stone • Synnex • Systemax • Tangent • Targa • Tarox • TCL • TTL • Tongfang • Toshiba • Trigem • Twinhead • Velocity • Vestel • Viewsonic • viliv • WD Corporation • Wortmann • xplore • Zoostorm • ZT ~incl. (branding only): BioStar • Foxconn • Intel • M$ $urface • VirtualBox • VMware
OEM's Branded = 133~
•BIOS Mode supported: Legacy and/or UEFI
• You can force install 'ANY' brand theme by reading and using the Force_Theme_[readme].txt
Editions for OEM Activation
• Server 2008 • Server 2008 R2 • Server 2012 • Server 2012 R2
• Win10... • Home • Pro
• Win8.x... • Core • Pro
• Win7..... • Starter • Home Basic • Home Premium • Pro • Ultimate
• Vista..... • Starter • Home Basic • Home Premium • Business • Ultimate
Objective - add $oem$ folder to .iso /usb.
• $oem$ method can be used to apply activation & manufacturer brand to your Win10 • Win 8.x • Win 7 • Vista '.iso'/usb
• NOTE:- PC needs (Win8.x and Win10 'OEM-DM' • Win7 '2.1 slic' • Vista '2.0 slic') bios to apply genuine oem activation.
• Project includes optional Telemetry disabling, (WinTel.cmd), for all supported OS's and adds domains to block through Route commands.
• Optional Retail activation method via online, if needed.
How To
Win8.x|Win10
Place the downloaded '$oem$' folder in the 'sources' folder of your 'clean' iso, and add custom 'ei.cfg' file to the same 'sources' folder and edit|save iso. Windows will install the edition identified from 'ei.cfg' file. (Project 'Options' folder includes 'ei.cfg' instructions). OOBE.cmd will call tool that will extract embedded 'OEM-DM' key from bios (if exists), and apply the serial during installation.
Win7
Place the downloaded '$oem$' folder in the 'sources' folder of your 'clean' iso, and delete the 'ei.cfg' file from the same 'sources' folder and edit|save iso... during install you will have option to select the edition of 'Win7' you want installed (ie. Starter • Home Basic • Home Premium • Pro • Ultimate)... if you don't delete 'ei.cfg' file, that's OK, just means Ultimate will install by default.
Vista
Place the downloaded '$oem$' folder in the 'sources' folder of your 'clean' iso, and delete the 'PID.txt' file (if exists) from the same 'sources' folder and edit|save iso... during install you will have option to select the edition of 'Vista' you want installed (ie. Starter • Home Basic • Home Premium • Business • Ultimate)... if you don't delete 'PID.txt' file, that's OK, just means serial used on that file will determine edition installed.
• Please read the 'readme' files included in the download folder, for additional information.
• "UltraISO" recommended to edit|save your .iso, preserving 'bootable' image.
Editions for OEM Activation
• Win10.. • Technical Preview • Consumer Preview
• Win8.x... • Core • Pro
• Win7.... • Starter • Home Basic • Home Premium • Pro • Ultimate
• Vista.... • Starter • Home Basic • Home Premium • Business • Ultimate
• (Vista-Win10) If not known edition, branding only takes place.
Objective - add $oem$ folder to .iso /usb.
• $oem$ method can be used to apply activation & manufacturer brand to your Win10 • Win 8.x • Win 7 • Vista '.iso'/usb
• NOTE:- PC needs (Win8.x and Win10 'OEM-DM' • Win7 '2.1 slic' • Vista '2.0 slic') bios to apply genuine oem activation.
How To
Win 10
Place the downloaded '$oem$' folder in the 'sources' folder of your 'clean' iso, and edit|save iso. OOBE.cmd (Install.cmd) will extract embedded 'OEM-DM' serial from bios (if exists), and apply the serial during installation.
Win8.1
Place the downloaded '$oem$' folder in the 'sources' folder of your 'clean' iso, and add custom 'ei.cfg' file to the same 'sources' folder and edit|save iso. Windows will install the edition identified from 'ei.cfg' file. (Project 'Options' folder includes 'ei.cfg' instructions). OOBE.cmd (Install.cmd) will extract embedded 'OEM-DM' serial from bios (if exists), and apply the serial during installation.
Win8.0
Place the downloaded '$oem$' folder in the 'sources' folder of your 'clean' iso, and edit|save iso. Windows will install the edition that matches the embedded 'OEM-DM' serial in your bios (if exists).
Win7
Place the downloaded '$oem$' folder in the 'sources' folder of your 'clean' iso, and delete the 'ei.cfg' file from the same 'sources' folder and edit|save iso... during install you will have option to select the edition of 'Win7' you want installed (ie. Starter • Home Basic • Home Premium • Pro • Ultimate)... if you don't delete 'ei.cfg' file, that's OK, just means Ultimate will install by default.
Vista
Place the downloaded '$oem$' folder in the 'sources' folder of your 'clean' iso, and delete the 'PID.txt' file (if exists) from the same 'sources' folder and edit|save iso... during install you will have option to select the edition of 'Vista' you want installed (ie. Starter • Home Basic • Home Premium • Business • Ultimate)... if you don't delete 'PID.txt' file, that's OK, just means serial used on that file will determine edition installed.
• Please read the 'readme' files included in the download folder, for additional information
• UltraISO recommended to edit|save your .iso, preserving 'bootable' image
Included link for images to be used with System Brand Changer if users prefer using a desktop branding tool with a nice gui, created by Alphawaves.
Whats new
Added 'Unlock Defender' (W1x), this unlocks certain settings that are usually locked by the OS. Note the Windows Security icon may not show on the taskbar
until you open the app for the first time. When you run a scan you may get the threat about 'DefenderTamperingRestore' or similar wording this is because
the 'DisableAtFirstSeen' registry item is set to disable so that it not grab any 'threat' it sees before you got a chance to exclude it. You can either allow
Defender to reset that parameter or allow it to keep that setting disabled, the choice is yours. Also certain possible spying/leaked telemetry is disabled such
as the submit samples and cloud based parts. These are greyed out because they are policy edits and do not affect the use or updating of the Defender app etc.
This option will auto-disable the MRP's 'Disable Defender' option as it is pointless to have both so this 'Unlock' option will take preference over the other. The
option to unlock defender is only operative for W1x and is ignored/not needed for older OS's.
Note that on Vista kernels when using the 'Disable Defender' option you may get errors after logging in. But to overcome that don't use the MRP option as when you
disable Defender in that OS likewise in Win7/8.x it will stay disabled and not re-enable, unless m$ have changed that policy.
If you wish to get rid of the Edge's taskbar icon then select the 'Use MRP's slimmer Start menu and TaskBar' as this will clear out the taskbar to the bare minimum. Reboot is required.
Re-worded a few log entries to reference the use of Windows 11 correctly as some entries may still of said Windows 10, even though the kernel is basically the same
for now at least.
Due to some changes in the Win1x theme, (in the OS's itself), the color of the Start, Action Centre and Taskbar will probably be the title bar's accent color so for example if set
to Blue then the Start, Action Centre and Taskbar colors will change to Blue as well.
Added 'Disable TitleBar Accent Color' being used on Start, Taskbar and Action Center. In responce to the above OS theme changes. Select it to prevent the accent color being used.
Added 'Disable Special Keys' this includes Sticky, Narrator etc the ones that when caught by accident was a pain to turn off! This should eliminate that issue.
Added 'DisableF1Help' this disables the pressing of F1 for help which for some is a nuisance when you catch the key by mistake! This appears to mainly work for
Explorer windows and the [?] icon is now inoperative there too. For Notepad and other Apps etc the F1 still opens the online help as normal.
Added 'DisableMeltSpectr' this disables the Meltdown/Spectre patches and can help speed up a older CPU, but at the sacrifice of 'security'. Not that many attacks have been made!
Added 'DisableWindowsUpdate' this however may get overridden by a manual Update or M$ and not always work as expected. You can still use the pause feature/quality update
option to prevent updates that way. Or simply use other stop updates tools of your choice.
Added for w1x: 'Prevent Drive Auto Encryption' this will only work properly on a real PC if Secure boot is turned off before OS installation, if a VM or TPM is detected
then this option will auto disable to prevent setup or later issues. Better to use a unattend.xml with thetrueset in it.
See in the Optional>w1x folder for unattend.xml files that can be used for windows 10/11 to turn that and other things off.
Fixed an issue where explorer or file-explorer in windows 11 (Insider/Canary Build mainly) would not work or crash.
Updated the 'Remove all safe apps' routine to be more time efficient and with help from 'Dark Dinosaur' for the tweaked P/Shell script it uses to exclude specific apps.
Some updates to the log entries, the early log has more information added.
Note: Using VMWare v17 and a VM setup as 'Windows 11' and using the TPM + the Password hoops it makes you enter for that, can cause issues with MRP, on real w11 capable
hardware there is no issues only on VMware v17 Virtual Machines. Sometimes there can be a 'hung' OS installation or longer delays between sections of the OS Setup.
Homepage:
Download Links
Rapidgator
Nitroflare